
BE BOLD.
THERE’S NO OTHER OPTION.
NOTES FROM THE PROTEST BANNER LENDING LIBRARY
by Aram Han Sifuentes
I learned to sew when I was 6 years old, the year we moved from South Korea to California.
My parents didn’t know what they’d do for work when we arrived. Luckily, someone in the Central Valley’s small Korean community hired them both to work at a dry-cleaning business. For 27 years, they’ve worked six days a week, 12 hours a day. Eventually, they were able to open up their own dry-cleaning business. My father works the machines, cleaning, pressing, spotting, and ironing, and my mother hems and alters clothes. When I was young, we’d sit in the living room after dinner and watch TV as my mom would work on alterations she’d brought home.
Spending time with my mother inevitably meant sewing with her. We would all contribute, ripping seams or bad zippers, sewing on buttons, and mending tears and holes in clothes — always other people’s clothes. This is how I learned to sew, and why it is political for me. I will always see my work from my spot in the living room, always sewing with my family to make a shared living as newcomers in the United States. My art is inextricably linked to my immigrant identity. My mission as an artist is to tell our stories, to create spaces that empower immigrant women of color, spaces that speak back.
Like many, I was devastated by the election of Donald Trump. I woke up the day after it happened all full of fury and readiness, searching for a platform to express my anger. Protests started all over the country — protests at airports to defy Trump’s racist bans, protests at the border to stop the caging of migrant children, protests many millions strong denouncing sexism. I looked around at these marches and blockades, and I saw a need I could help fill as an artist: I started to make protest banners in my apartment, but I longed to feel a sense of community, too. I invited friends to make banners with me, and we amassed many. Soon, I opened workshops to the public, and the public showed up.
Going to protests was less and less of an option for me. I’m not a citizen in the United States, making me more vulnerable in any confrontation with police. I had just become a mother, and street action was all but impossible. But banner-making allows me to still carve out a way to resist what I see happening here and globally. It’s a way to have my creative and political voice heard. I soon realized that the people who would make banners with me did so because they, too, needed to participate, resist, and speak up without taking on certain risks. These are caretakers, non-citizens, undocumented, disabled. My protest banner making workshops have become a site of social solidarity through making. And making is a form of resistance.
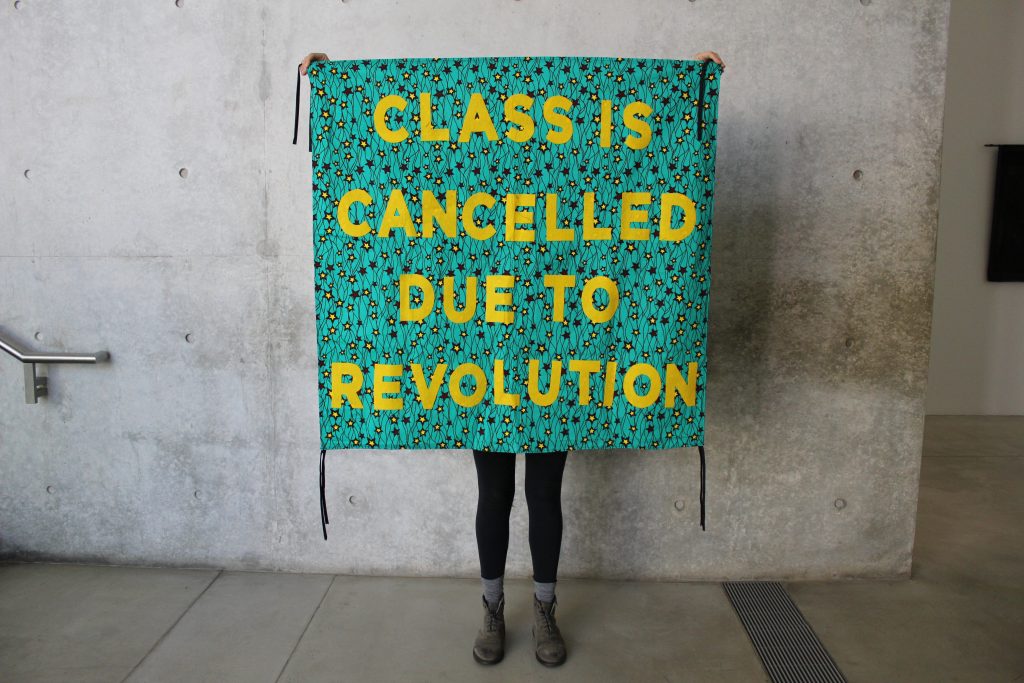
The Protest Banner Lending Library is a mobile, pop-up experiment. It has had iterations in Chicago, St Louis, and at protests and art spaces around the country. It is intended to be a space for people to learn to make their own banners, but also a communal sewing space where we can all be heard and supported, no matter how different we are.
This is why the lending part is important: people check out handmade banners to try out in real life, amplifying and understanding the words of other people with shared goals. It is adaptability, resource sharing, action, and harmony.
These banners (and the slogans they bear) are living stories. They are made by one person, then used for protest by another, then returned and taken again. The banners carry the histories of the hands that made and held them, the places they have gone and will. I’d like to share with you how to make your own.
How to Make a Protest Banner:
There are a few different ways I make protest banners.
+ Option 1: Use permanent markers (optional upgrade: textile markers) and draw your banner.
+ Option 2: Use acrylic paint and paintbrushes to paint your banner.
+ Option 3: Create a fabric banner with felt or fabric letters. This is how most of the banners in the Protest Banner Lending Library are made. You’ll need to use an iron, scissors, and pins. Don’t be afraid to ask for guidance.
You might ask, why make fabric signage rather than using card or posterboard? First, fabric banners are usually easier to lug around. You can easily fold them up and carry them around in your bag without damage. The second advantage is that fabric lasts longer than paper, and can be reused many times, which is the whole idea of the library. And, though it may be a bit pessimistic to say, we are probably going to be fighting for these causes for a long time.
STEP ONE: SLOGAN
You’d be surprised how many people get stuck on the first step, deciding on a slogan. Trust your gut. Brainstorm together with others. Here are some starters to help:
The thing itself: Sometimes it’s as simple as just a word, such as LOVE or PEACE; or putting “no” in front of what you stand against, such as NO HATE or NO GUNS.
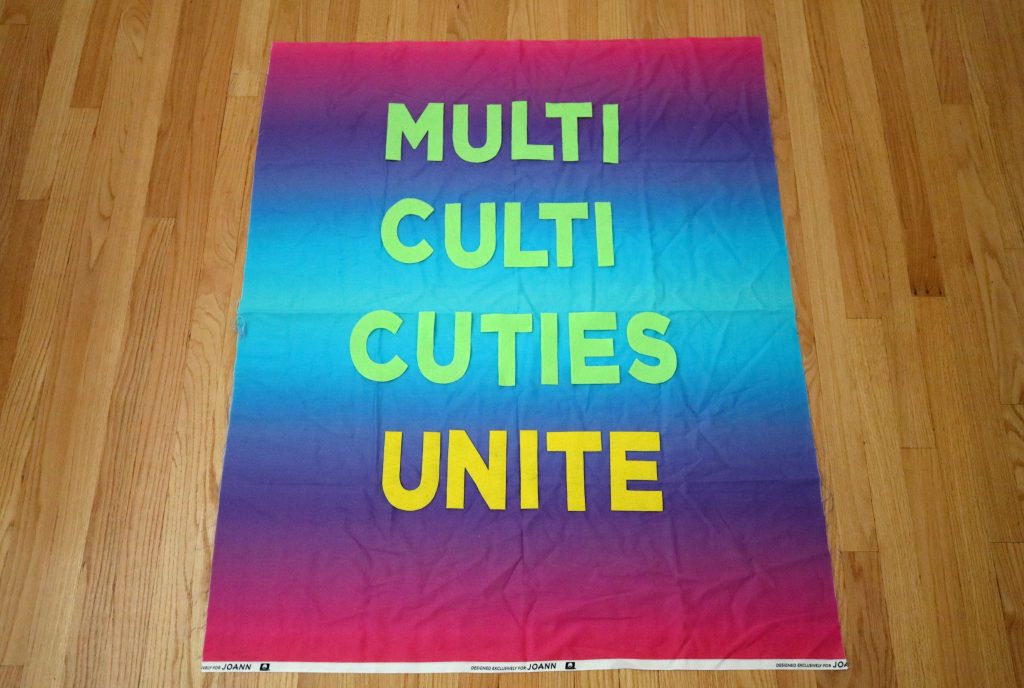
Who you are: We’re in a time when affirmation statements about who you are can be a bold slogan. For example: Brown and Proud, Black is Beautiful, Multi Culti Cutie, They/Them/Theirs, Proud Immigrant, Young Fabulous Latinxs
The world when you’ve won: Another way to find a slogan is to complete this sentence: The Future is _________. The Future is Female and Brown, The Future is Accessible, The Future is Non-Binary, The Future is Queer AF, The Future is Me. Rhymes and alliteration can also be punchy.
Keep in mind that super specific banners about an event or person may be more difficult to re-use. But sometimes, of course, they’re necessary.
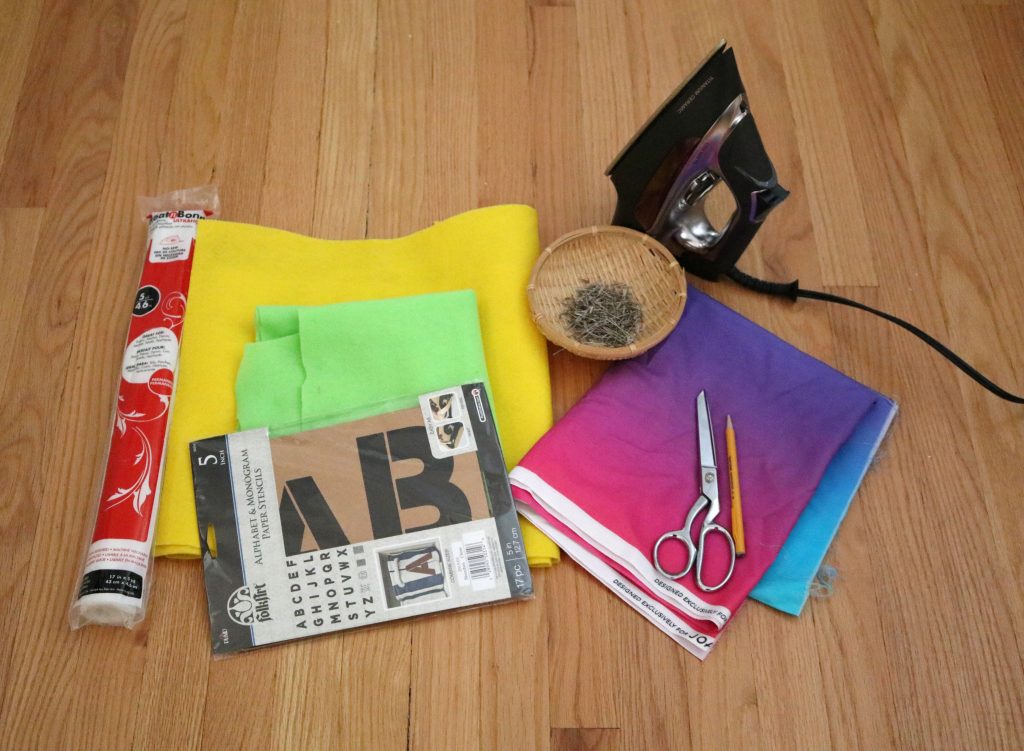
STEP 2: GATHER
1 yard of background fabric (cotton preferable)
1⁄2 yard of felt for the letters (felt preferable because it doesn’t fray)
Scissors
Pencil
Stencils
Pins (T-pins work best)
Heat n Bond Iron-on Ultrahold Adhesive (about one yard per banner) or similar interfacing
Iron
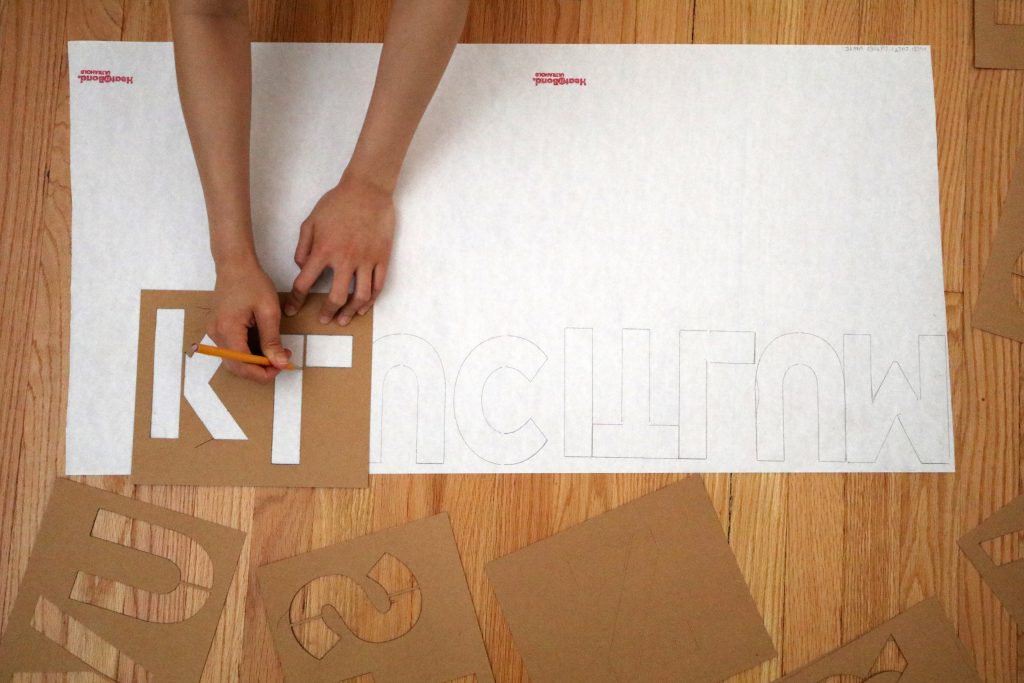
STEP 3: TRACE
Trace the stencils onto the paper side of the Heat’n Bond. For images, you can also use stencils or draw directly onto the Heat’n Bond. Make sure the letters and images are flipped horizontally.
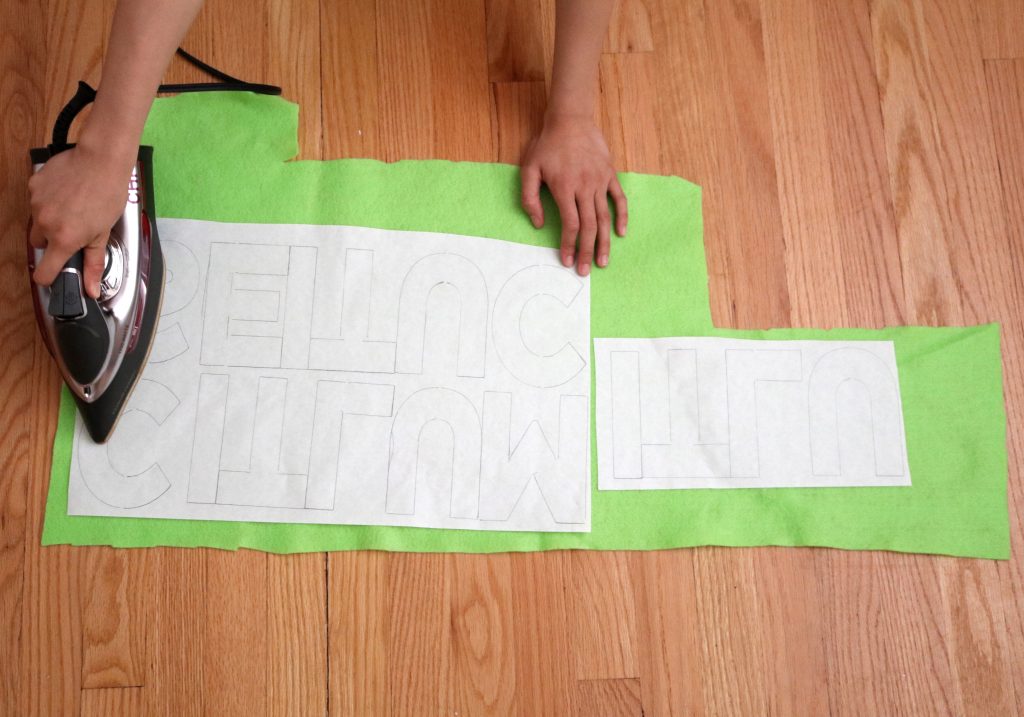
STEP 4: IRON
Iron the rough side down onto the felt. Iron on medium heat (wool setting). Watch out though, it’s hot!
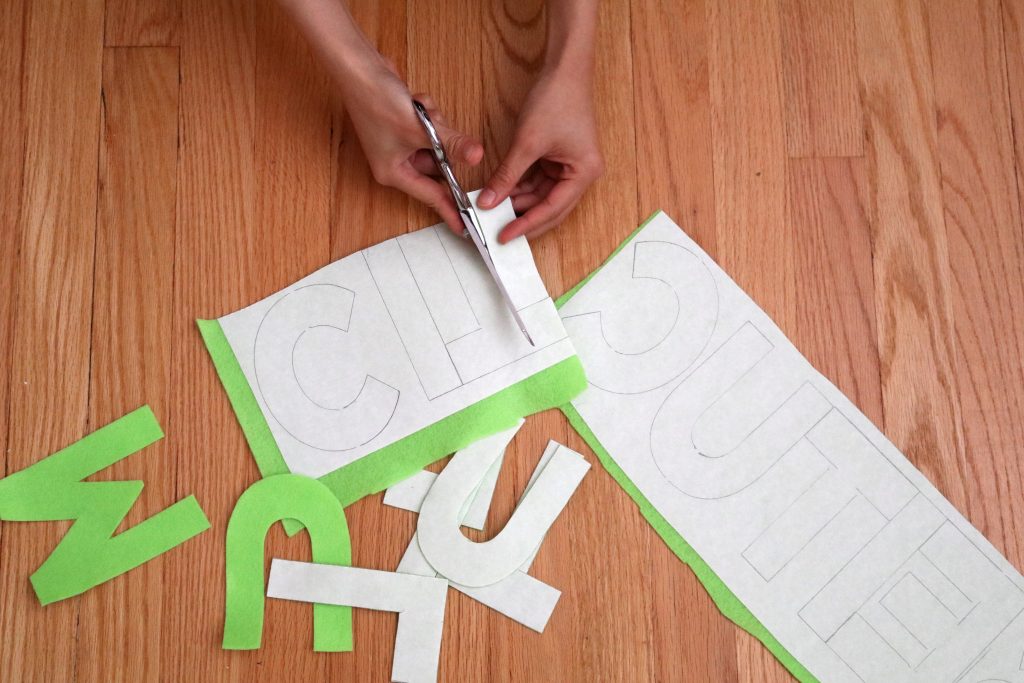
STEP 5: CUT
Cut out the letters and images.

STEP 6: PEEL
Peel off the backing paper
STEP 7: PLACE
Put the shiny peeled side down onto the background fabric. Place the letters as you’d like the final design to be. This might take a few tries.
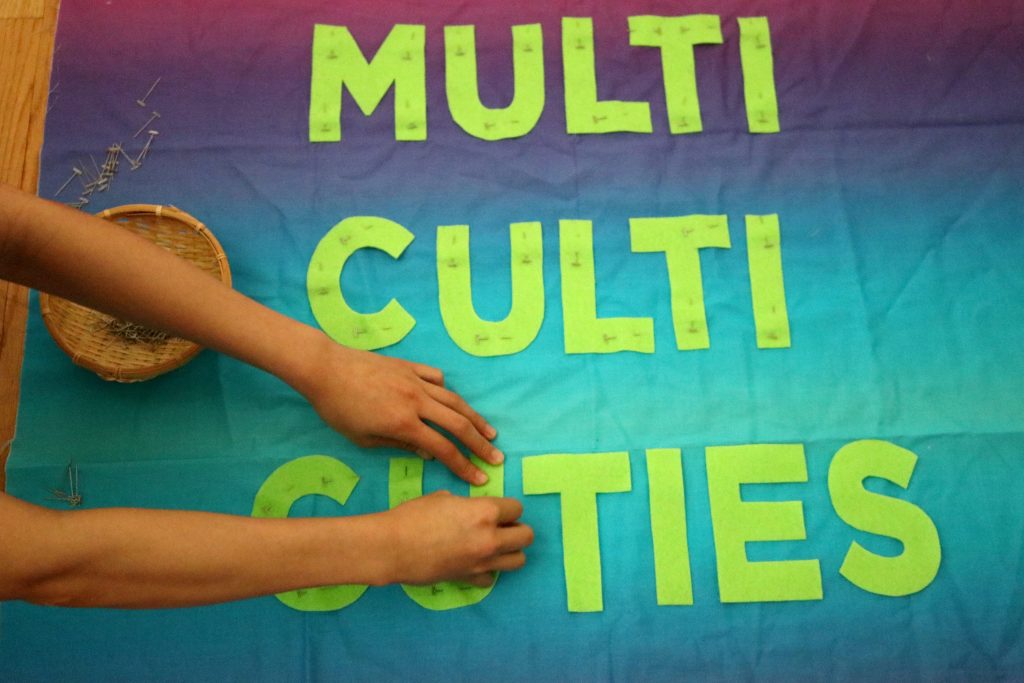
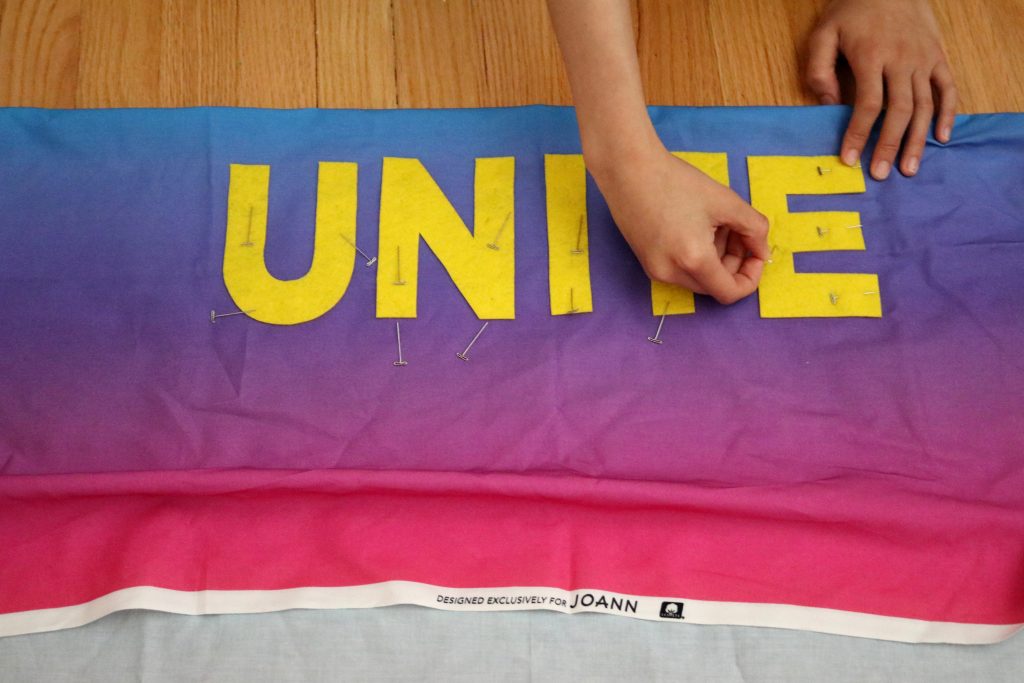
STEP 8: PIN
Pin down the letters to the background fabric. Put pins through every end or dangling piece of each letter so it doesn’t move around. The best way to pin is to pinch both fabrics, stab the fabrics with the pin, then flatten it out.
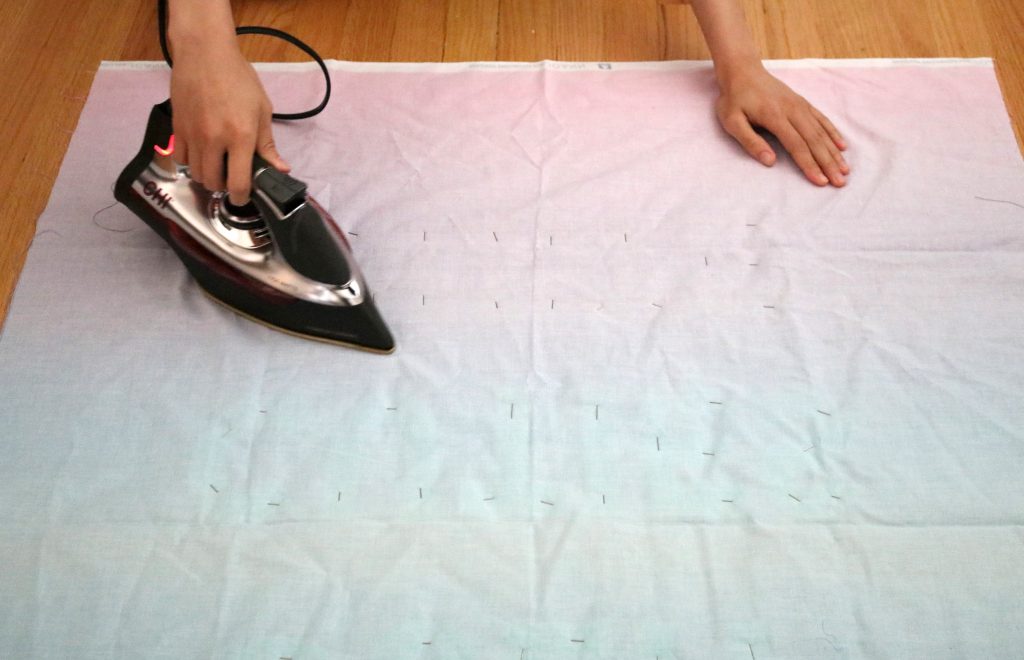
STEP 9: IRON
Flip the fabric over and iron on medium heat from the back. This will make the letters and fabric adhere as the interfacing melts.
STEP 10: REMOVE PINS
Flip the fabric over and remove the pins. The letters should be stuck to the fabric. If not, flip over again and iron again until all letters are firmly adhered.
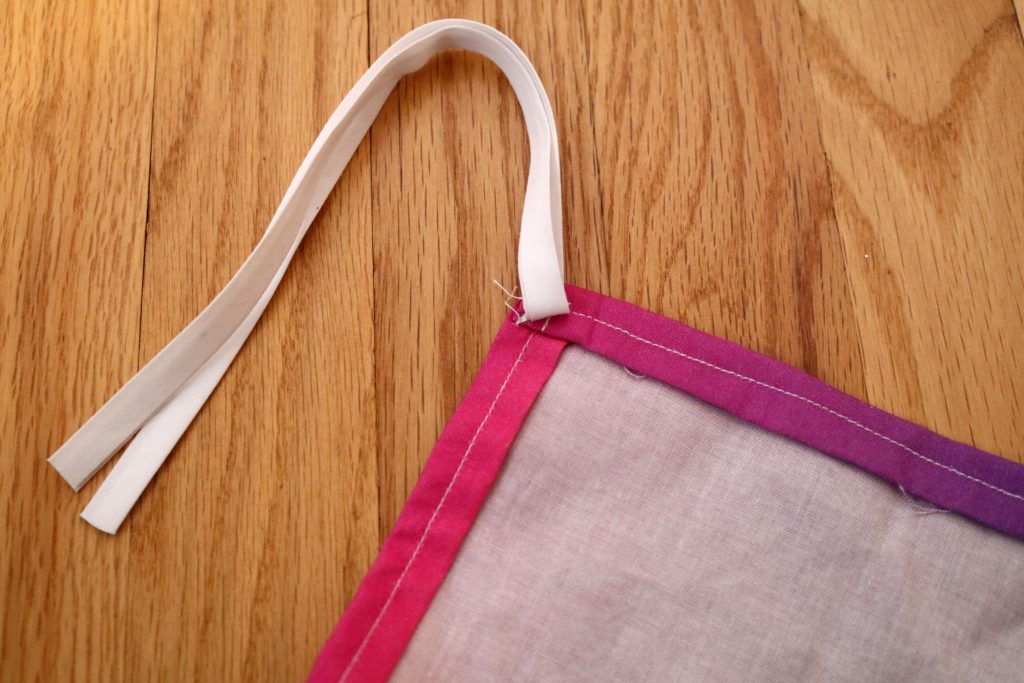
STEP 11 (optional):
You can sew the edges of the banner to add hand straps to the corners, or a sleeve for a pole. We use bias tape for the straps.
Sewing without the interfacing is also very possible, but take care that you don’t warp the base fabric.
On windy days, a banner becomes a heavy sail. You may have to cut V shaped holes the air can go through, rather than get blown away.

STEP 12: USE, SHARE, AND MAKE MORE!
Consider where you’d like to see this banner in the world. Who do you want to see it, and what type of impact will this create? Let these thoughts guide you.
You can put the banner up in your room, display it in your window, hang it over a highway, take it to your school, use it in a protest or march, or donate it to a local organization or to activists. You can also always donate your banners to the Protest Banner Lending Library, where the public can check out and use your banner.
Find out more about Aram Han Sifuentes and the Protest Banner Lending Library at aramhansifuentes.com.
A version of this article originally appeared in Funambulist.