
Zinester’s Toolkit is a column where zinester’s share the tools and processes behind their craft.
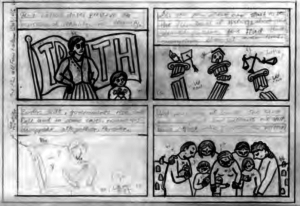
“BABCIA” IS POLISH for grandmother (pronounced “bap-cha”). My Babcia helped raise me as a child in Poland, but after my family immigrated, Alzheimer’s made it so I couldn’t get to know her further. Her passing, the loss of my only living grandparent, left a void in my heart and severed my connection to my ancestral past. Creating this comic has been a process of healing and reconnection. I chose the medium of papercut for two reasons: it is visually similar to linocut, a printmaking process I have used to make comics in the past, and it is related to the Polish papercut folk art of “wycinanki.”
THE PROCESS
1. WRITING
I begin, as with most of my comics work, with the writing. When I started working on Babcia in 2013, I wrote one page at a time, focusing on memories or questions as they arose. After a few years, the larger story of the comic began to emerge, and I did a lot of free writing to capture my memories and ideas. I developed an outline as part of a grant application, which helped me give structure to that writing, and to identify gaps in the story that needed more work or research. Now, when I make a new page of Babcia, I pull from sections of this manuscript.
2. DIVIDE THE TEXT
After I’ve selected my piece of writing, I split it into panels. Deciding where to divide the text is part practical (I can fit 2-4 lines of text per panel) and part lyrical.
3. LAYOUT AND PENCIL DRAWING
Next, I figure out a page layout and draw it out on tracing paper. I love drawing on tracing paper, since pencil marks can be completely erased many times without damaging its surface. Sometimes I have an image in mind for the text as I write it; the rest I figure out at this stage.
4. TRANSFER DRAWINGS TO PAPER STOCK
Then I work out how to translate the pencil drawing into papercut. I work with a limited palette of paper colours that translate well to grayscale printing. It can be challenging to separate the images into only three tones, but working within these constraints pushes me to try new things. I mark up the drawing with little letters indicating what colour paper it will be cut from, then transfer my drawings onto that paper.
5. CUT, PASTE, AND INK!
I cut the black frame that forms the panels first. I always get a funny feeling that the comic is finished at this point. All of the conceptual work is done, and I just need to cut out the images — which is the best part. I cut the paper with a hobby knife and scissors. Once all pieces are cut, I glue them down on paper, which is the most finicky part of the process. I ink the lettering, erase the pencils, scan, edit, and I’m done.
Many people think this is am onerous process for making a comic. I think it’s fun! I enjoy making things with my hands. The most challenging aspect is the writing. Since this comic is about real people, places and events, I feel a deep responsibility to represent things accurately and consider as many perspectives as possible. I’m very conscious of the fact that I am writing about a country that I have not lived in for most of my life. I left Poland when I was six, and though I speak the language and was raised in the cultural traditions in a diasporic community, I still sometimes doubt that my perspective is valid.
I have done research to help quell those worries, and so that I can write from a more informed place. But the more I learn, the more I learn that I have more to learn. I work as a librarian, so I am hyperaware of the biases inherent in who has the authority to speak about history, and I want to consult multiple sources about everything to get a clearer picture. However, at a certain point, I’ve had to accept that I will never be able to understand everything and can only tell the story from my limited perspective. When I find myself getting caught up in research, I bring my focus back to why I started this project in the first place — my sweet, loving Babcia.