By Joel William Vaughan
Any zine collector, casual or concerted, will eventually encounter this very material conundrum: how do you organize a large collection of maddeningly thin booklets, most of which lack spine-labels?
Rather than rely on busted shoe-boxes and teetering piles, let’s take a page from medieval monks and 19th-century periodiclers? With simple tools, you can bind your old zines (or signatures of your xerographic epic) into durable, shelf-ready collections by using “tapes,” an age-old tool of bookbinders.
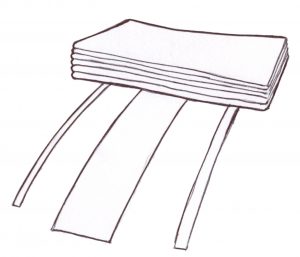
Tapes are simply thin strips of paper or cloth. These can be sewn around a gathering of zines into a single book, no glues or pastes required. There’s a reason bookbinders have bound collections this way for centuries: not only is the method cheap, easy, and simple, but it doesn’t compromise the structure of the zines themselves (we’re only poking a few tiny holes), and is easily reversed and repairable, and keeps your zines in good shape.
MATERIALS LIST
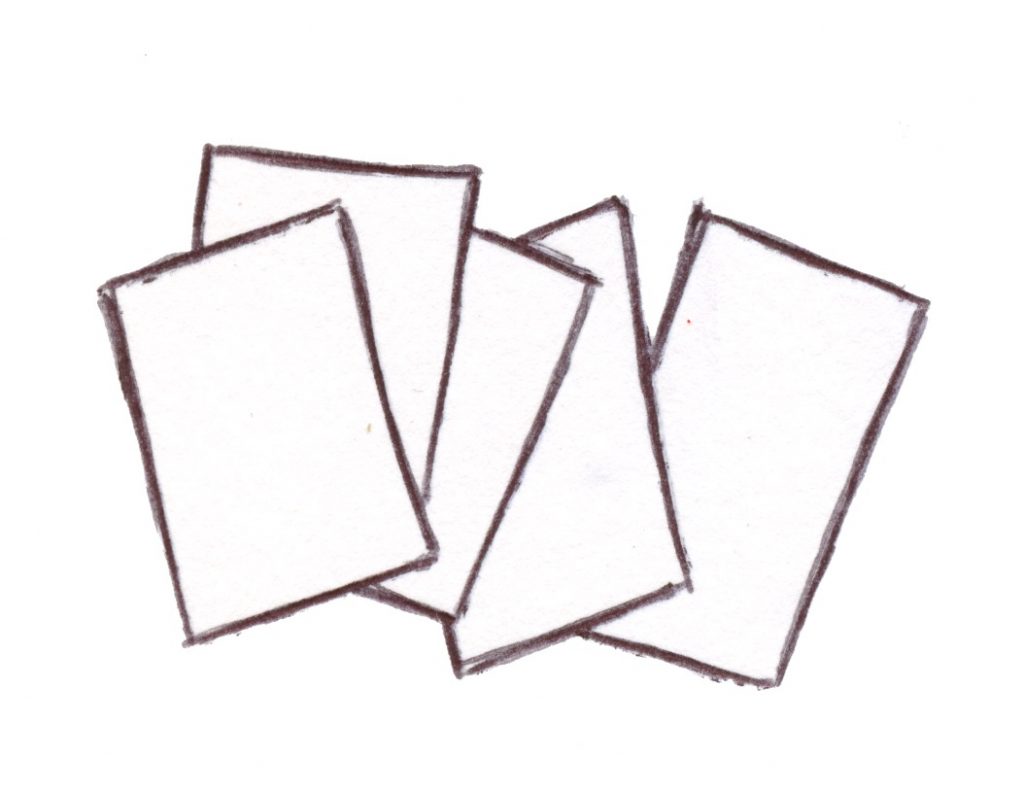
-A handful of zines
-Needle and thread
-Scrap paper or cloth
-Scissors
-Awl (Optional)
STEP 1: Get your zines together.
Choose some zines to bind together and put them in your preferred sequence. They must all be saddle-stitched (bound with staple or thread through a folded spine) and roughly the same size.
STEP 2: Cut and label your tapes.
Cut out three strips of paper. First, two thin ones to be your “tapes”, and a wide one will be your label. I’ve cut an additional piece of paper as a label, because the red paper was too textured to write on.
When writing your label, make sure the text runs no wider than the height of your stacked zines. Otherwise, the title won’t fit the spine.

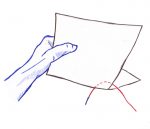
STEP 3: Make a sewing template.
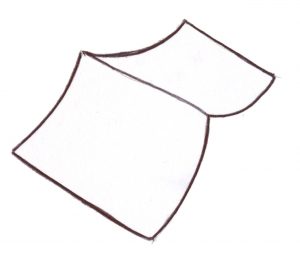
Cut some scrap paper to the same height as the zines in your book (if they vary, the largest). Fold this in half, then align the fold with the spine of your uppermost zine.
This is your “sewing template,” which you’ll use to make sure the holes in the zines and tape line up perfectly.
Use a pencil to mark the “top” and “bottom” edges, as it’s easy to lose track of these.
STEP 4: Mark your sewing stations.
Lay your tapes and label on the face of your sewing template, spacing them across the spine in the position you’d like them to cross the spine of your finished product. I usually place them in spots that will hide the zines’ staples. With a pen, mark your sewing template on either side of each strip. Also, put marks a half-inch from both the top and bottom of the template.
Unfold your sewing template and extend those points in straight lines over your centrefold. These will be your “sewing stations,” where your binding holes and thread will go in and out.
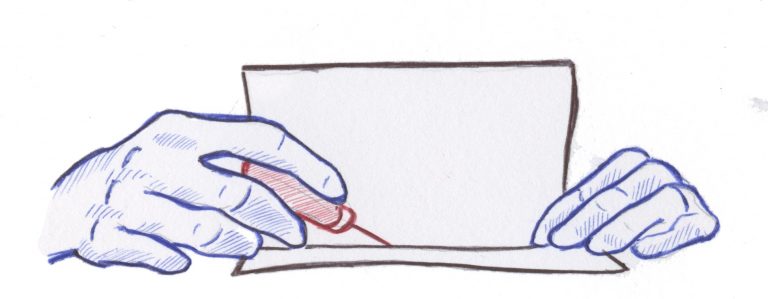
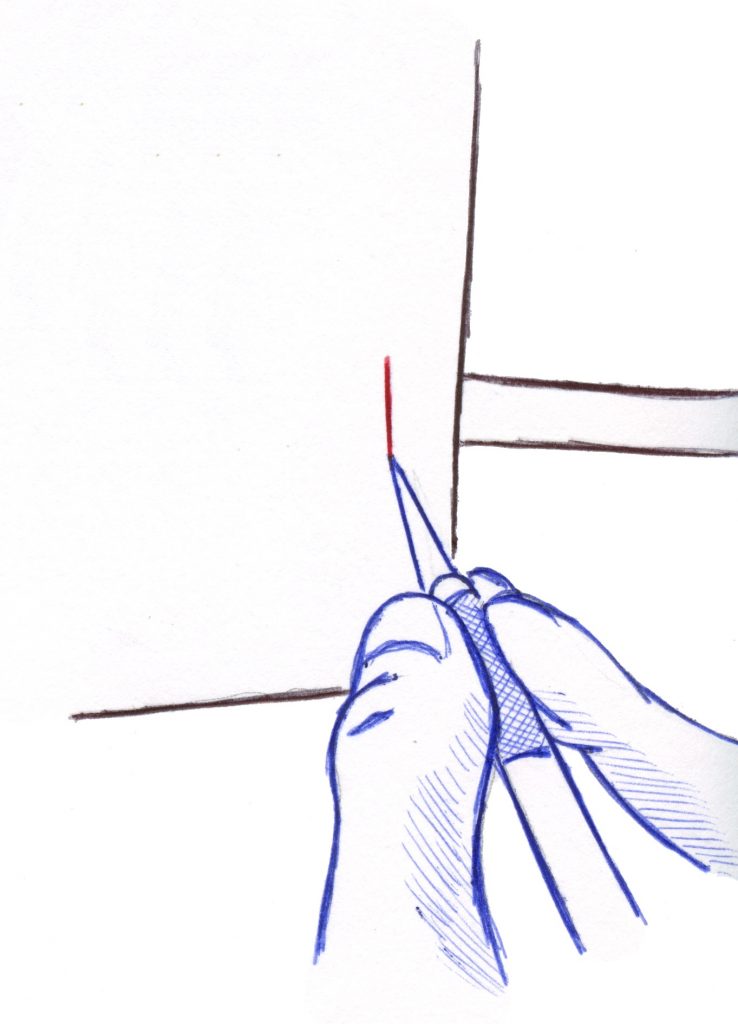
STEP 5: Poke holes into inside of the template’s spine.
Using an awl, needle, or thin nail, poke holes for your sewing station.
Pull the spine up to the edge of a table and poke through the centrefold at an angle that won’t scratch your furniture.
STEP 6 : Poke through your stations.
Place your sewing template in the centrefold of your bottommost zine.
Make sure the top and bottom marks align with the respective ends of your zine.
Poke holes through your sewing stations and the zine. Set aside, and repeat for the rest of your zines, such that the inner holes align in all of them.
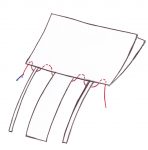
STEP 7: Gather your zines and position tapes.
Once they all have holes, gather and stack your zines face up at the edge of a table. Position the tapes between the holes you just poked, and fasten them with some scotch tape so they don’t budge. Label them!
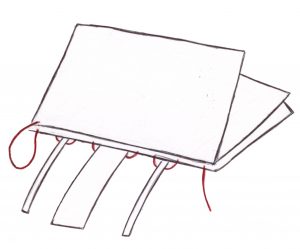
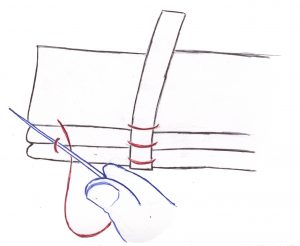
STEP 8: Begin sewing.
Thread a needle with an arm’s length of string to begin sewing. For your first hole, enter the bottom sewing station of the last zine from the outside. Leave a few inches of loose thread, so you can tie it off later.
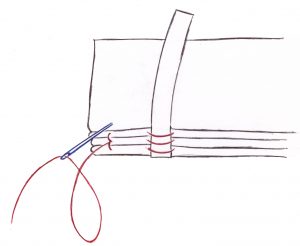
Exit through the second sewing station and wrap around the outside of your tape, then sew back into the zine through the third.
Repeat for the label and second tape, exiting the spine from the hole to their right, wrapping around, and entering the spine through the hold to their left. If all goes as planned, you should reach the top of your zine, exiting through its topmost sewing station. Pull snug.
STEP 9: Sew the next zine.
Place your next zine on top and enter through its topmost sewing station. Pull snug. Repeat the same process as the first zine, but go left-to-right. Take your time, but trust your instinct to guide the needle — you’ll catch on fast. When you reach the bottom of your second zine, tie off (but don’t cut the thread!) onto the loose end of your original thread and then enter the bottom sewing station of your next zine.
STEP 10: Sew to the top and tie off.
Repeat the process for this zine until you exit the topmost sewing station. Here, you’ll run your thread behind the link between your bottom zine and the zine above it… And enter through the top sewing station of your next zine.
This is called “kettling” and we’re going to do it whenever we reach a top or bottom sewing station from now on. Continue sewing up and down your zines, adding one every layer and kettling at the top and bottom. If at any point you run out of thread, simply enter your next sewing station (so the knot will be hidden away) and tie a new thread to your dwindling one.
When you reach the last sewing station of your final zine,
kettle through the link below and tie off. Enter the zine through that sewing station and snip your thread, leaving a small, hidden tail.
Repeat for the label and second tape, exiting the spine from the hole to their right, wrapping around, and entering the spine through the hold to their left. If all goes as planned, you should reach the top of your zine, exiting through its topmost sewing station. Pull snug.
STEP 11: Jog and distribute tension.
Now you’ve got a bound book, but it could use some tidying up! Snip any loose threads you have hanging about, always leaving enough of a tail that the knot doesn’t come loose. Use your needle to pull the tied-off thread at the book’s bottom into its sewing station, hiding it away. Pull your tapes and labels outward along the spine so that they’re the same length on both sides.

STEP 12: Cut tape slots in cover.
A quarter-inch from your spine, use an exacto knife to carefully cut slots in the covers of the front and back zines. These should each match the width and position of your tapes and label.
STEP 13: Put tapes through slots.
Thread the excess tapes and label through those new slots, and trim them on the inside of your covers, leaving an inch or so.
![]()
STEP 14: Weigh it all down.
Keep your new book under weight for a few hours to a day, to help it settle into its new binding. I use a brick wrapped in paper.

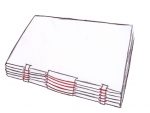
STEP 15: Enjoy for life.
Shelve that baby! Or read him, I’m not the boss. Congratulations on compiling some of your many loose zines into a single bound volume. You now have an excuse to go buy more zines (and make more of these).
Tips and common mistakes:
1. Make sure you’re always kettling in the same direction. If you run your needle right-to-left on your first kettle, but left-to-right on the one above it, then things will quickly begin to look messy.
2. At every stage, pull snug, not tight! You don’t want to rip your sewing holes or tear your thread.
3. If you run out of thread at any point, move through the closest sewing station into your zine, and tie a new length of thread to the old one. Trim the knot’s loose ends and continue with your sewing.
4. Many bookbinding guides will recommend you use linen thread coated with beeswax. Don’t do this. Linen thread is great, but exploiting animals is a bad look. It will ruin your zines.